
How To Take Sharp Photos of Food
This is an all too common question of food photographers. How can I take sharper photos? It may seem like the answer to your sharpness problems is spending more money on new lenses, cameras, or Photoshop plugins. However, more often than not, a few tips and tricks can save the day. Food photography specifically, should not present too many unique obstacles to achieving super sharp images. So, let’s explore what could be preventing you from getting the sharpness you’ve been striving for.
Sharpness Starts with Proper Focusing
Even the best lenses can only perform well if the user focuses properly. Auto-focus doesn’t work well in low light or on low-contrast subjects, sometimes it may be necessary to manually focus to take sharp photos of food. But, when auto-focusing, you need to use a single point AF. Newer digital cameras have an amazing ability to guess how beginners want their photos taken, but it won’t always be correct. Even if you are a beginner, it is not hard to start using a single point AF system and get rid of some of the camera’s guess work.
In order take sharp photos of food, you need to be the one in control. Each camera has a different way to access the auto-focus settings. In the end, your goal is to see one square in the viewfinder light up upon pressing the shutter button halfway down.
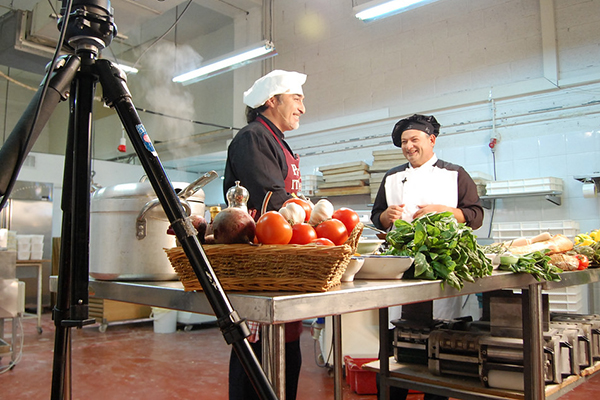
Always Use a Tripod
There is no reason to not use a tripod when trying to take sharp photos of food. If you’re following a couple down the aisle, you need to move a lot and not stand out too much. A tripod could get in the way in this case and many more. Since food is a stationary subject that does not shift over time, changing angles slowly or awkwardly moving around with a tripod doesn’t really matter.
Apart from good focusing practices in general, the tripod is the best way to ensure sharpness. Food photographers often use lenses of fairly long focal length, perhaps 100mm. This means the effective focal length on a cropped sensor DSLR would be 160mm (x1.6). A general rule to avoid camera shake when not using a tripod is to always shoot with a shutter speed faster than 1/X with X being your current effective focal length. This is because, the more zoomed in you are, the more each small movement reflects a change in the viewfinder. This effect is very pronounced when using telephoto lenses, although should also be kept in mind when using mid-range focal length lenses. Even when following this rule, a steady hand may still be necessary.
Using a tripod frees you from these worries. It holds the camera in place, meaning your capture will not suffer from camera shake or a slight change in point of focus. When dealing with shallow depth of field, one minuscule movement will throw off the look you were going for. One last consideration should be what kind of tripod you buy. This decision mostly depends on the weight of your camera, body and lens together. The bigger your camera, the more heavy-duty (and probably expensive) your tripod should be. Make sure to test any expensive tripod purchase with your heaviest equipment.
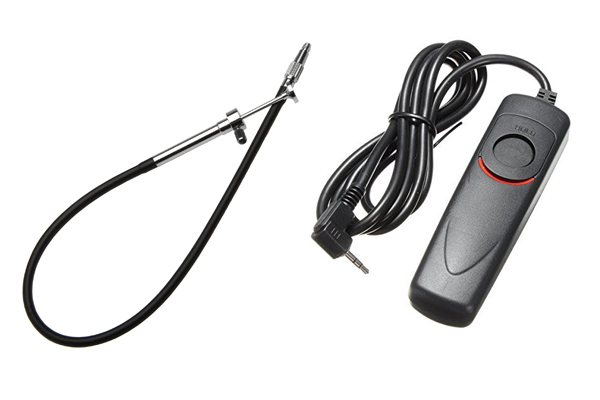
Shutter Release Cable/Remote or Timer Mode
Even when using a tripod there can be camera shake. This movement derives from the pressing of the shutter release button itself. Depending on the quality or stability of your tripod, this light touch on the camera may not cause any diminished sharpness. In many cases though, it is a very real worry. If your utmost concern is sharpness and you are either shooting with a very heavy rig or in low light, a remotely activated shutter will save you a lot of worry. Another fix for the problem is to use the timer mode on the camera. This can be a pain if you only have a 10-second timer, but many cameras have a 2-second timer as well.
If you have the ability to raise the mirror prior to a shot (mirror up mode, mirror lockup), do this as well before releasing the shutter. SLR cameras have a mirror that reflects the image into the viewfinder. If the image is reflected into the viewfinder, it cannot hit the film or the sensor. So, every time a photo is taken the mirror goes up and down. This is a potential cause of camera shake, leading to less-sharp images. The big drawback to bringing the mirror up is that you cannot see your composition in the viewfinder. Just pop the mirror up after the shot is ready to go and release the shutter only moments after. It’s pretty easy to get the hang of!
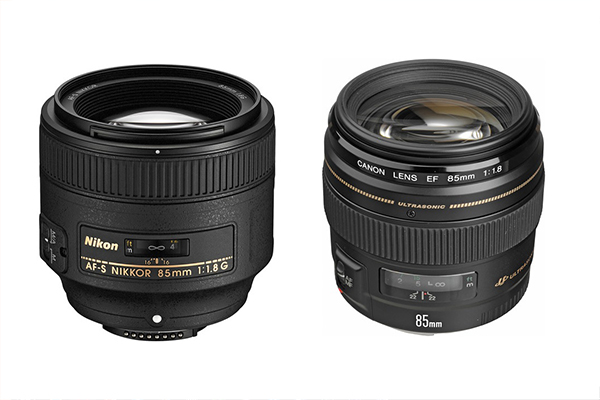
Take Sharp Photos of Food with Fixed Lenses
Fixed lenses are always sharper than zoom lenses. Why don’t more people shoot with fixed lenses? Well, for some styles of commercial photography a zoom is useful, or even indispensable. Also, even though they are a good value, you must buy at least three of them to cover the range of focal lengths a photographer must use. But, we are talking about how to take sharp photos of food, not sharp photos at sporting events. With food photography, one fixed focal length can work for the majority of your shots.
In art, it’s not good practice to make blanket statements such as, wide angle lenses aren’t necessary in food photography, but generally speaking it is true. First, they curve the food making it less realistic. Also, they struggle to create a bokeh effect (low depth of field blurring). Conversely, you don’t need the extremely long focal length capabilities of a nature photographer. That Chicken Tikka Masala you’ve been hired to shoot is not a pheasant hiding far away in the bushes—a super telephoto zoom lens is overkill. Basically, the drawbacks of fixed lenses won’t affect the food photographer as much as one of another genre.
Lighting and Contrast
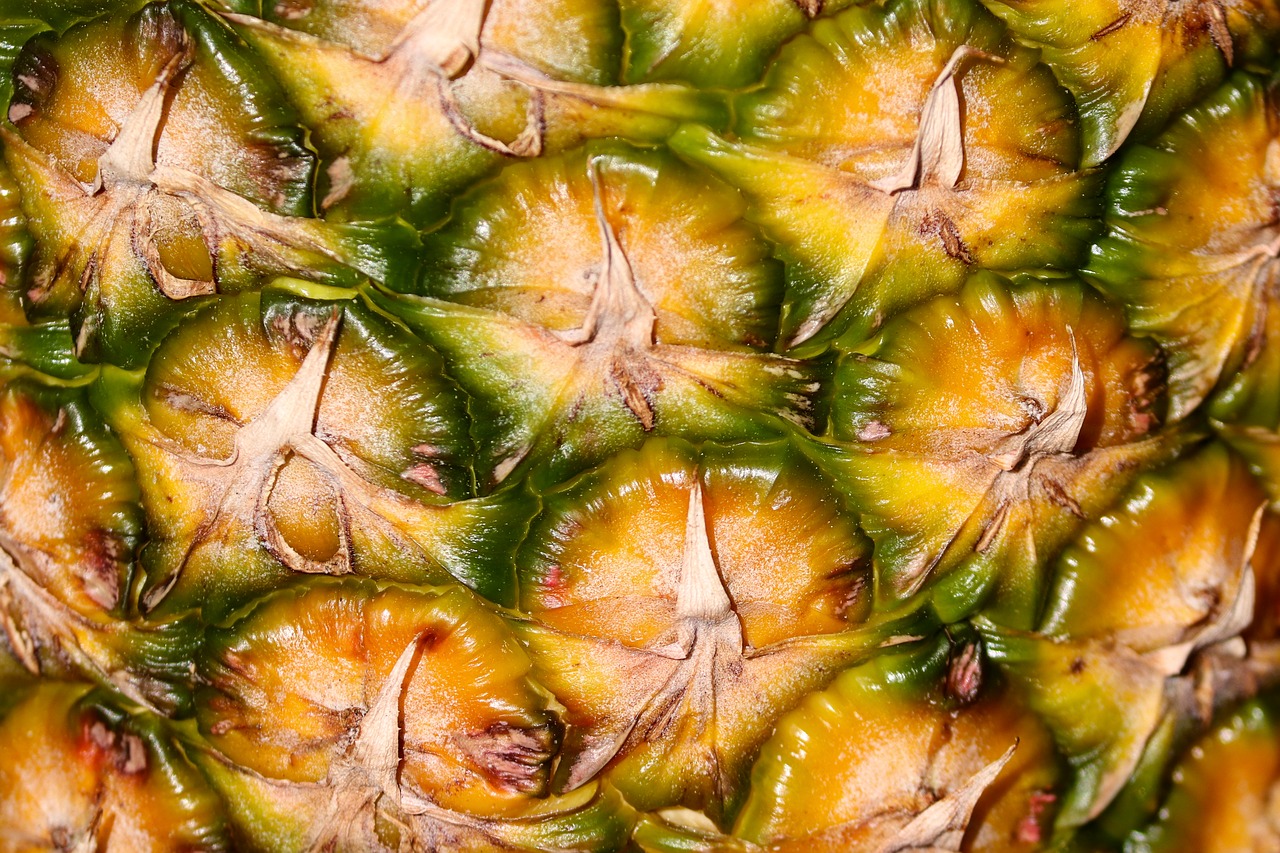
Although the image may be correctly focused and without camera shake, it still might not look too sharp. This is because contrast brings out sharpness. For example, if you take a photo of crab bisque, there is little chance for the sharpness to come out because the texture is uniform and the surface is flat (no shadows). In photos of soup, sharpness is best judged from the sprinkled herbs on top or the plate it sits on.
A pineapple though, has ridges, color differentiation, and many shapes. These elements allow for edges to form and for the viewer to perceive the sharpness. To take sharp photos of food, add ingredients and props that contrast monochrome or texture-less subjects to your setup. It is important that you consider sharpness in relative terms when editing photos, so you don’t over-sharpen.
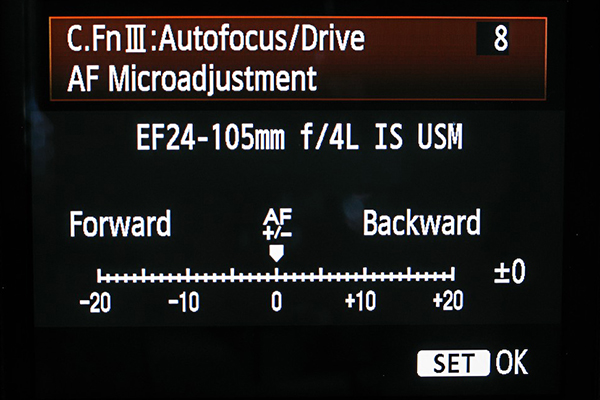
Lens and Viewfinder Calibration in Digital Bodies
To take sharp photos of food, there are two key camera calibration techniques to help. First, the viewfinder must be adjusted. Everyone’s eyesight is a bit different. That’s why there is a small dial to the side of most viewfinders. Try focusing close-up on something very high-contrast like printed black text on white paper. If the camera beeps and says everything is in focus, but what you see isn’t, adjust the dial until your eye sees in focus what the camera sees in focus.
Secondly, there is something called AF microadjustment (this is the name canon gives the function, but other brands may differ). This is a fairly advanced adjustment, but necessary if you feel your lens is under-performing. The same lens model can focus a bit differently because they are such complex instruments. It is extremely difficult for manufacturers to produce thousands of the exact same lens and one little difference could be throwing off your focusing abilities, which directly relates to sharpness. Go to the AF menu and screen (image above). Take a photograph close-up of text on paper where some letters are much close to the camera than others. Pick a very very specific point of focus and take a shot. You can do this a few times and observe whether the actual point of focus is the one you intended or a bit further back or forward. Adjust accordingly until the point of focus is as originally desired.
Post-production Tricks
There are many different methods of sharping in post-production. To take sharp photos of food, it is the last step, and a necessary one. The key to every sharpening method is to not overdo it. Do two things when sharpening: look at the overall effect on the image from far away and see how the grain of the photo changes close-up. It is a tough to know exactly when you have sharpened as much as you should, but you will get the hang of it. One great adjustment is “clarity”. Increasing clarity increases mid-tone contrast, so there is a perceived increase in sharpness.
Many sharpening tools differentiate between “edges” and everything else. You can boast the sharpness of your food image without harsh grain by using the high pass filter tool, which focuses on edges. Click here for an in-depth tutorial on using the high pass filter to sharpen. In Step 6 of the linked tutorial, the author mentions that using the overlay mode first gives you a preview of your sharpening. Do this, it will make things much easier.
We want to see some examples of how you achieve sharpness in your photos. Show off your whole portfolio and join us as a food creative. It’s a great way to get connected!
Published on: December 09, 2019
the best looking
content
for
food industry
folks
come &